· hands on
How to create a screencast
Creating a screencast can be challenging. You need the right hardware and software, and post-production is often overlooked. Here are some tips to make it easier.
Creating a screencast is harder than it seems. Despite from the idea, you need the right hardware and software to produce high quality content. Especially the post-production is often underestimated. To make your work easier, we would like to give you a few tips on the way.
Contents
Preparation
Desk
- Deactivate personal assistants (Amazon Alexa, Google Home, Apple Siri, ...)
- Turn-off clocks / alarms and other potential noisemakers
- Have a glass of water next to you in case you get a dry throat
Operating System
- Turn-off your system clock and calendar, so that your recording always looks up-to-date
IDE
- Increase your font size (i.e. from "14" to "22")
- Set your IDE to full screen mode (i.e. WebStorm: "View" → "Appearance" → "Enter Full Screen")
- Open all relevant files already in the IDE to access them via tabs
- Copy important code blocks to the clipboard to prevent errors when typing live
Recording Software
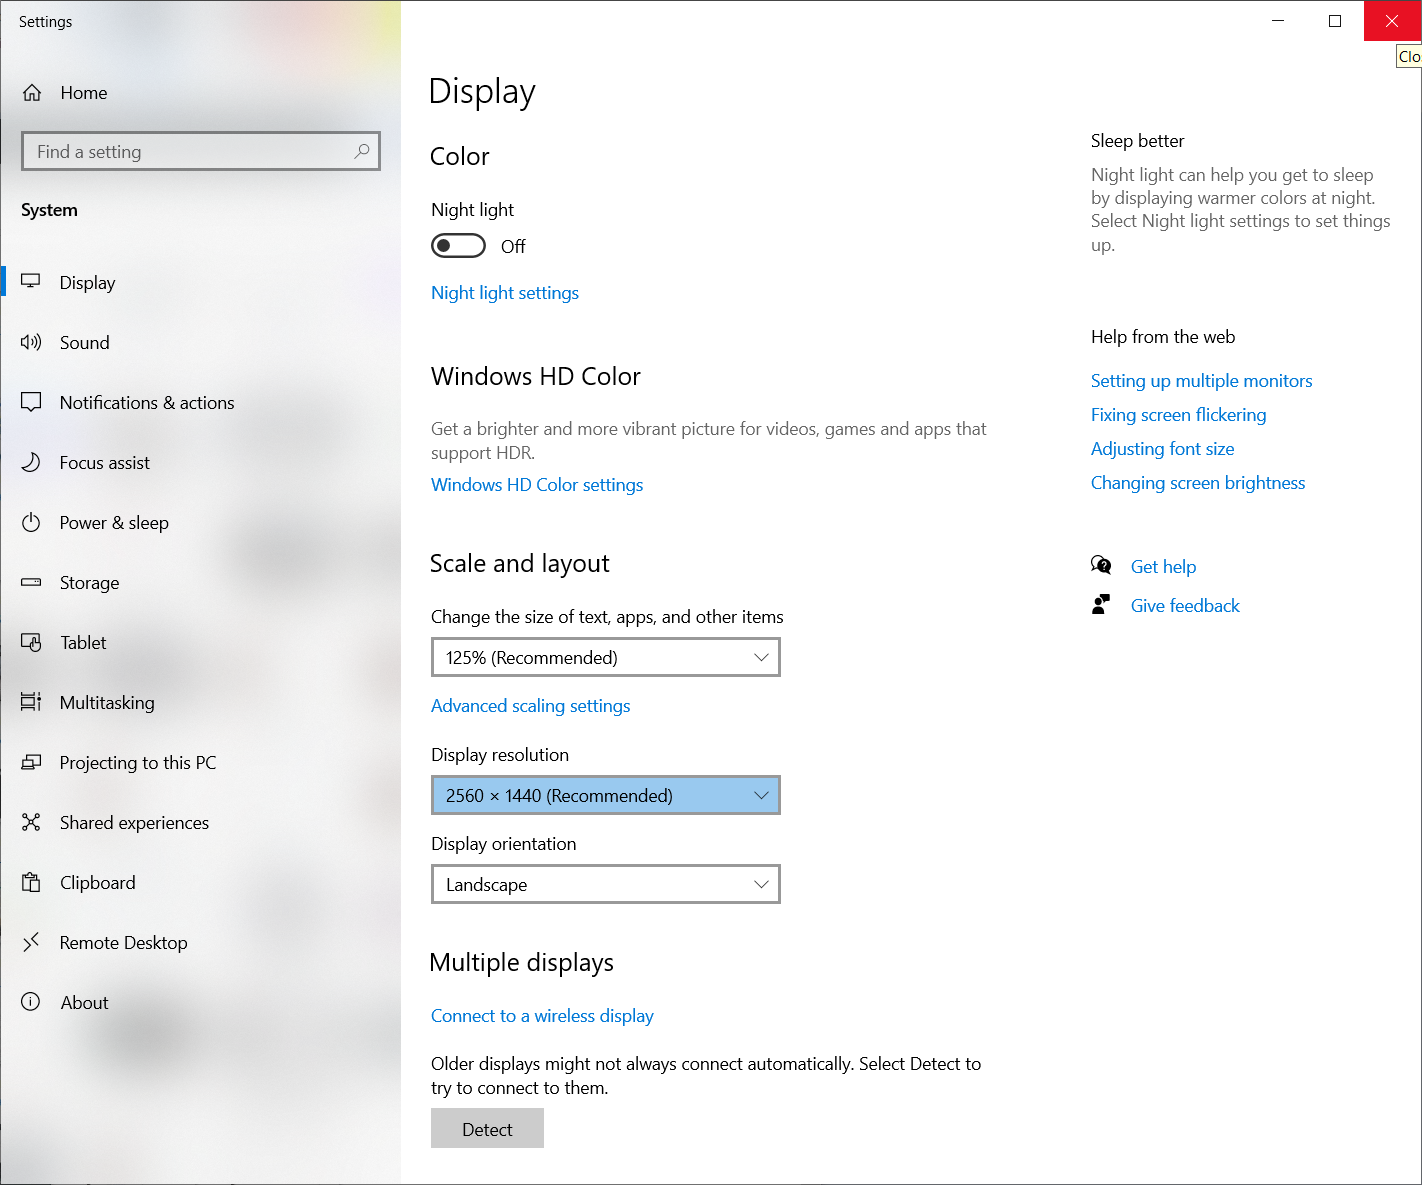
- Always record in your maximum screen resolution to have the best quality available (YouTube supports 4K at 60fps with ease)
- Make microphone test and adjust gain (loudness) if needed
- Save project (before starting the recording) on a drive with lots of free space, so that you don't run out of disk space during the recording
Screen resolution in Windows:
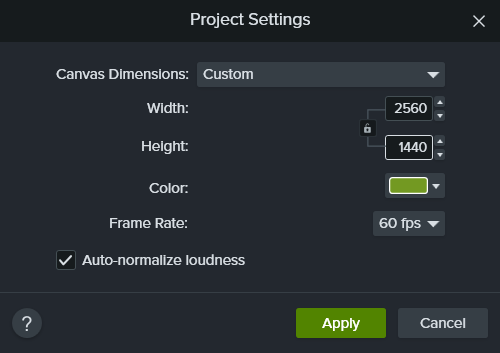
Camtasia project settings matching the screen resolution:
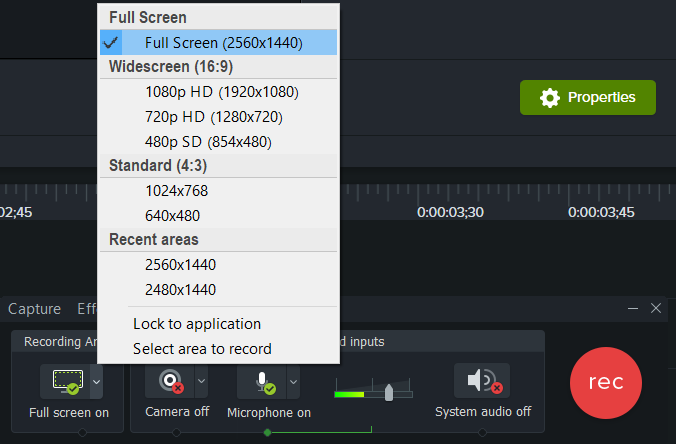
Camtasia full screen settings with sound check:
Important resolutions:
- HD (1280x720, 16:9)
- FHD (1920x1080, 16:9)
- 2K / QHD (2560x1440, 16:9), Example: Lenovo ThinkVision P24h-10
- Dual QHD (5120x1440, 32:9), Example: LG 49WL95C
- WQHD (3440x1440, 21:9), Example: Dell U3421WE
- 4K / UHD (3840x2160, 16:9), Example: LG 27UN83A-W
- 5K2K / WUHD (5120x2160, 21:9), Example: LG 40WP95X-W
- 6K (6016x3384, 16:9), Example: Apple Pro Display XDR
Post production
Audio editing
- Export audio from Camtasia Studio ("Export" → "Export Audio Only...")
- Import audio file in iZoptope RX Audio Editor
- Open "Modules" → "Plug-in" → "Ozone 9 Elements"
- Use the "Maximizer" to set the target loudness to "-14,0 LUFS"
- Use "Repair" → "De-reverb"
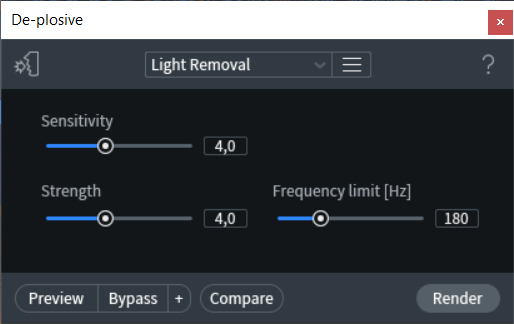
- Use "Repair" → "De-plosive"
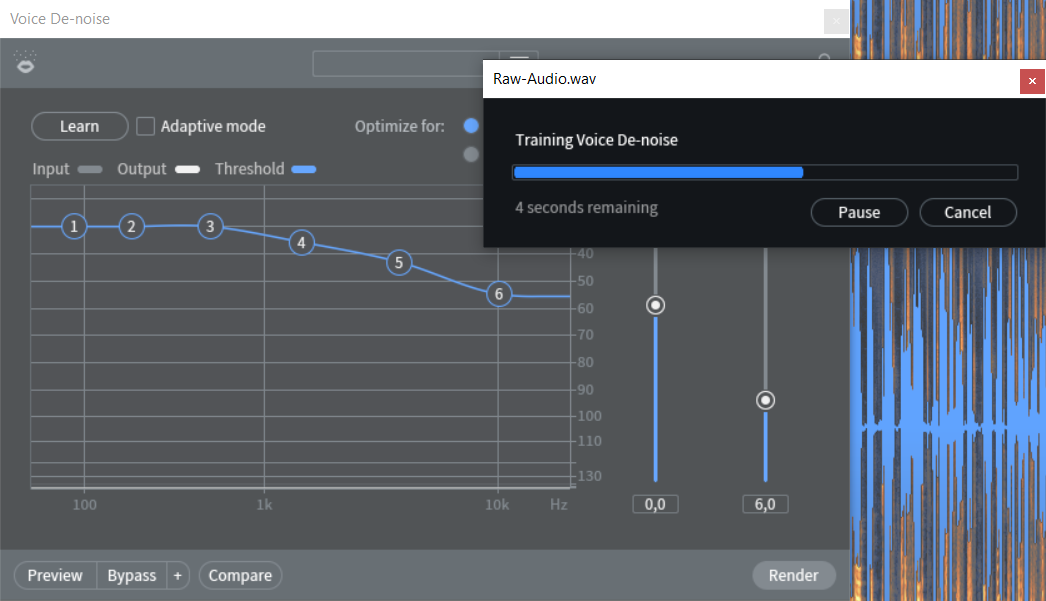
- Use "Repair" → "Voice De-noise"
Normalize Loudness

De-reverb

De-plosive
Voice De-noise